On a normal day, I have six or seven AI agents running at once. Claude Code in a few terminal panes, Codex in a couple more, and the odd chat in Claude or ChatGPT. I needed a better way to see which one is waiting on me.
So I bought a Logitech MX Keypad: nine little LCD keys and two page buttons. Logi has a well-documented SDK to help you build your own screens for the keypad. So naturally, I spent a few days with Claude Code building plugins for it.
Take one: a plugin per app
The keypad has a feature called “Adapt to App”. Bring an app to the front, and the keypad switches to that app’s profile. So the obvious plan was one plugin per app: Claude Desktop, the ChatGPT app, and iTerm. This works well for many creative apps, like Photoshop or ProTools.
Each app has a home page with categories such as Sessions, New, Prompts, Chats, and Settings. I kept the layouts in step, so the same key sat in the same spot across every app.
My default profile, the one that shows when no app has its own, became an app launcher.
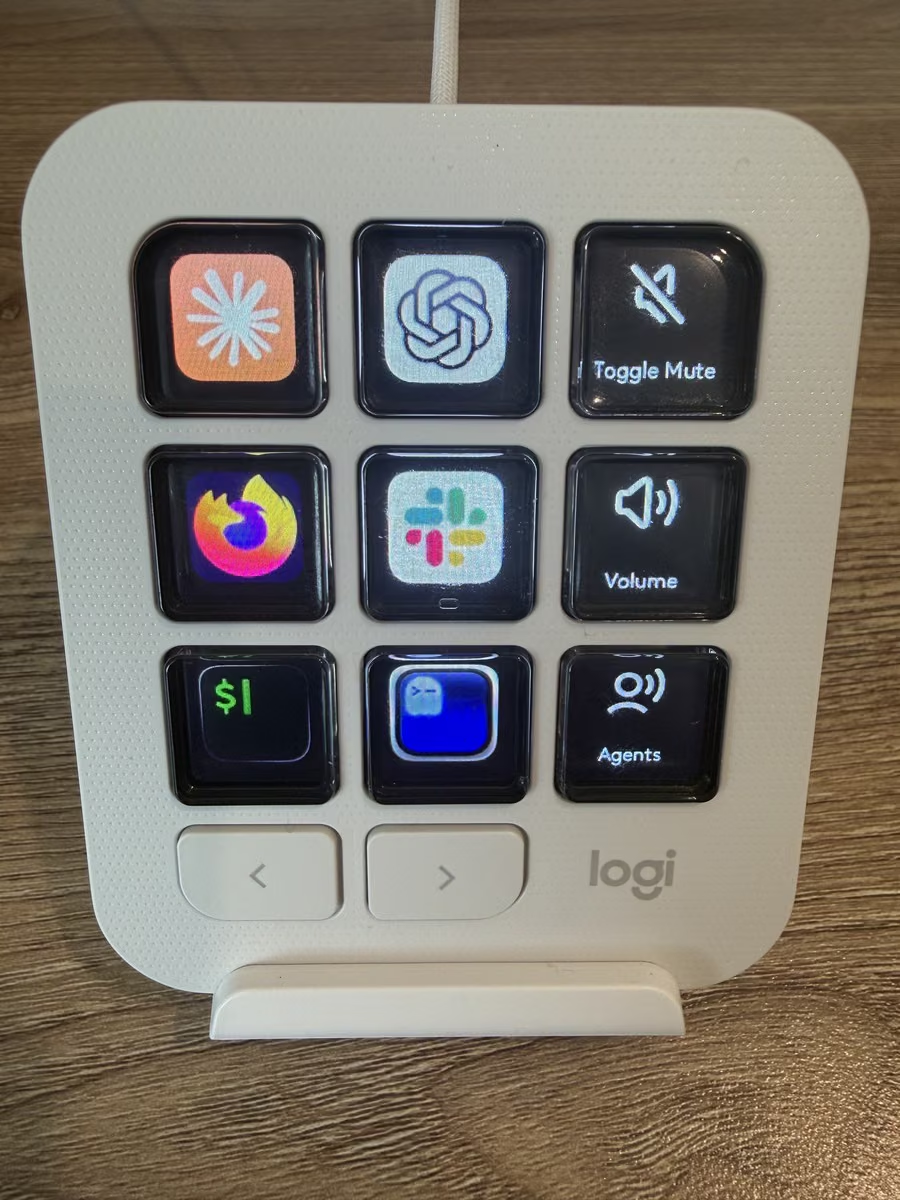
Then I installed herdr, a terminal multiplexer built for coding agents I have been meaning to try rather than iTerm with a half a dozen tabs. Now all my agents ran in herdr panes, and I needed a minute to figure out how to make that work, since I could have a Codex or Claude session in the same app.
Take two: plan it like a website
On web projects, we document and plan the user journey. We follow that journey to make sure the user reaches their goal. So that is what I did here, with me as the user.

Follow the workflow
My workflow with an agent has three steps:
- Notice that it needs me.
- Jump to it.
- Answer its question, or send it the next command.
The steps are the same whether the agent is a coding session in herdr, a Cowork task, or a ChatGPT thread. So the navigation follows them: a home page, a list of agents, and one page per agent.
Rules, like a design system
A few rules held through every screen:
- No key is bound to one item: every list is built live, so a new agent shows up on its own.
- Back is always the top-left key.
- Colors mean the same thing everywhere: blue is working, amber needs you, green is done, and gray is idle.
- There is also a key that jumps you to the agent that has waited the longest.
The screens
The screens live in one General profile. It is not tied to any app, so it stays put while I switch between terminals, browsers, and chat apps. It is generated from code and imported into Logi Options+.
Here is the Agents home page.
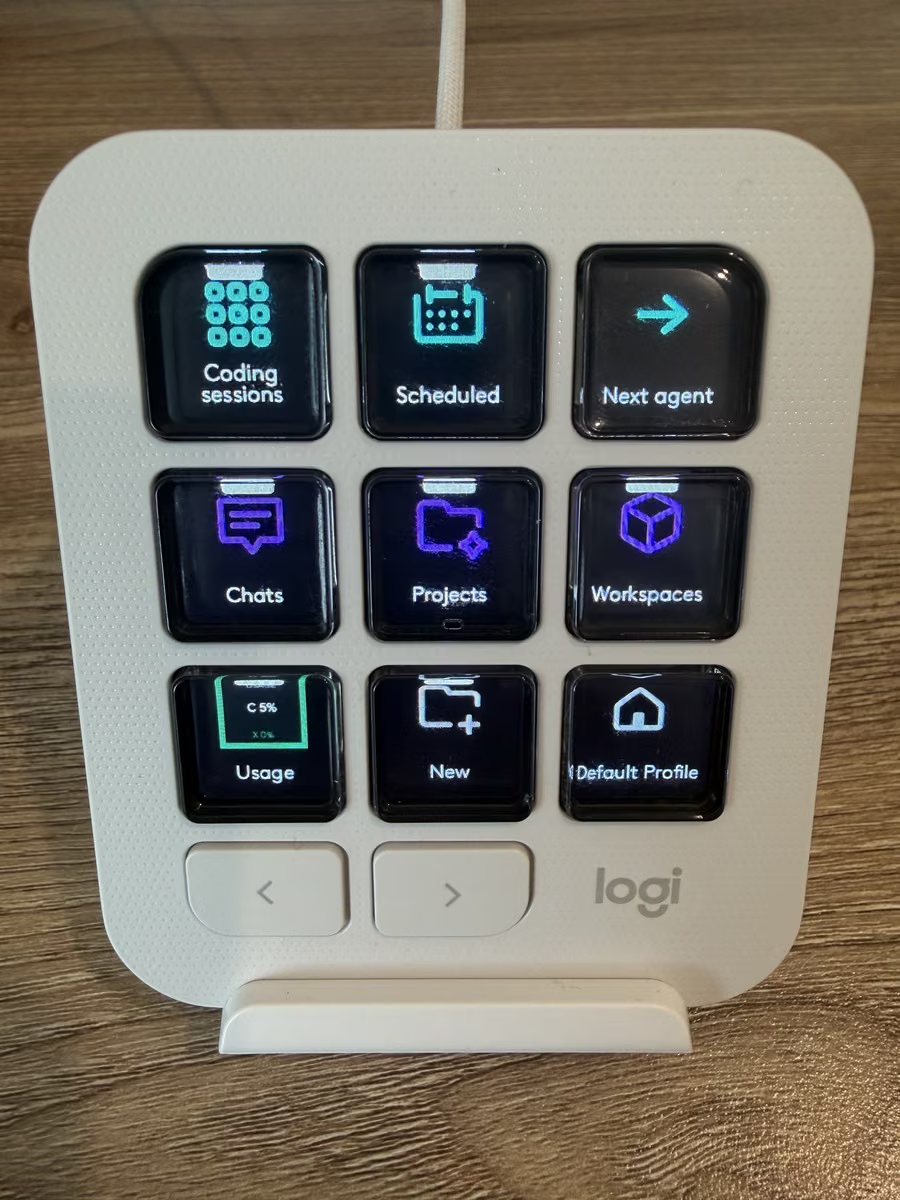
The bottom-right key switches back to my launcher profile, and the launcher has an Agents key that switches back here.
The coding sessions list every agent, wherever they run. The label at the top of each key indicates whether it is HERDR, CODEX, or DESKTOP. The yellow one has been waiting 56 seconds for an approval.
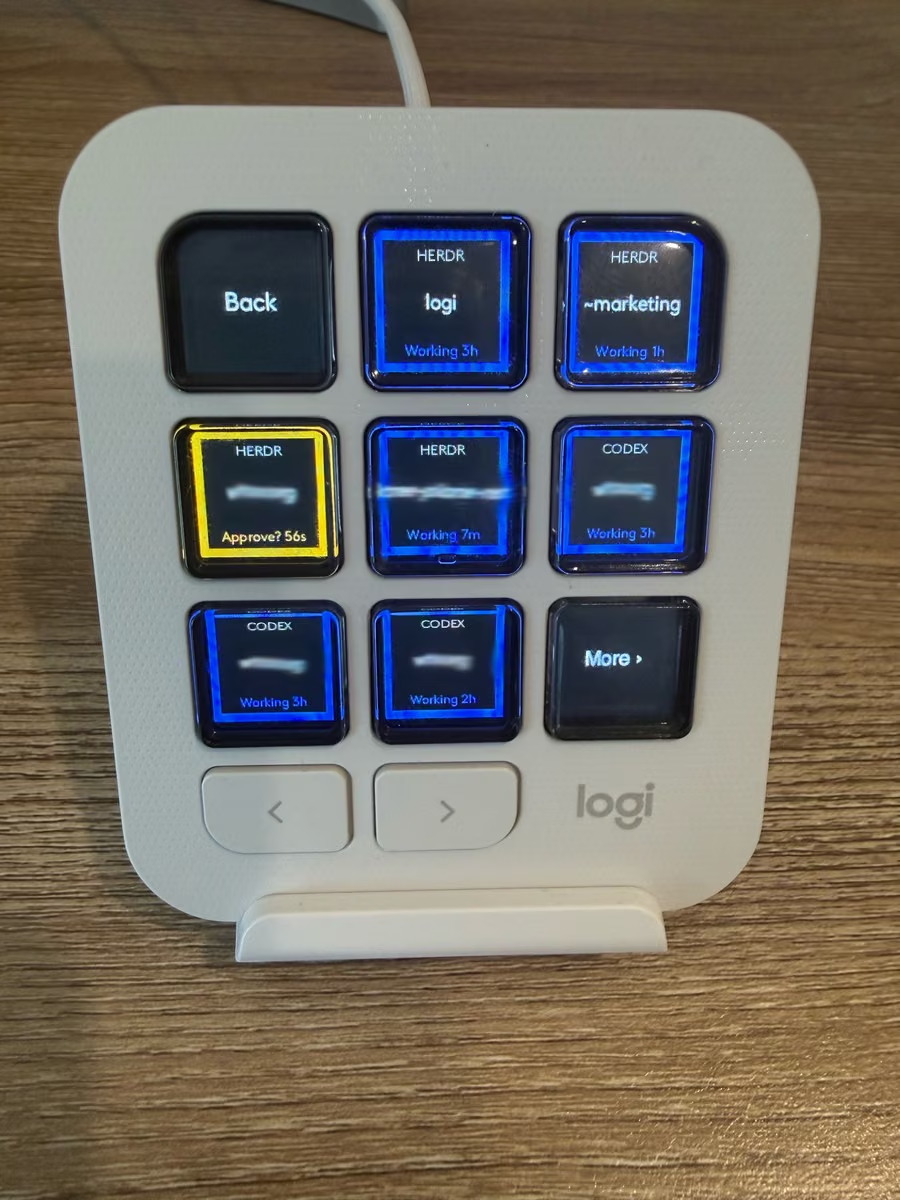
Pressing an agent brings it to the front of my screen and opens its page on the keypad.

When the agent is waiting
The keypad reads the agent’s screen through herdr and puts its real options on the keys.
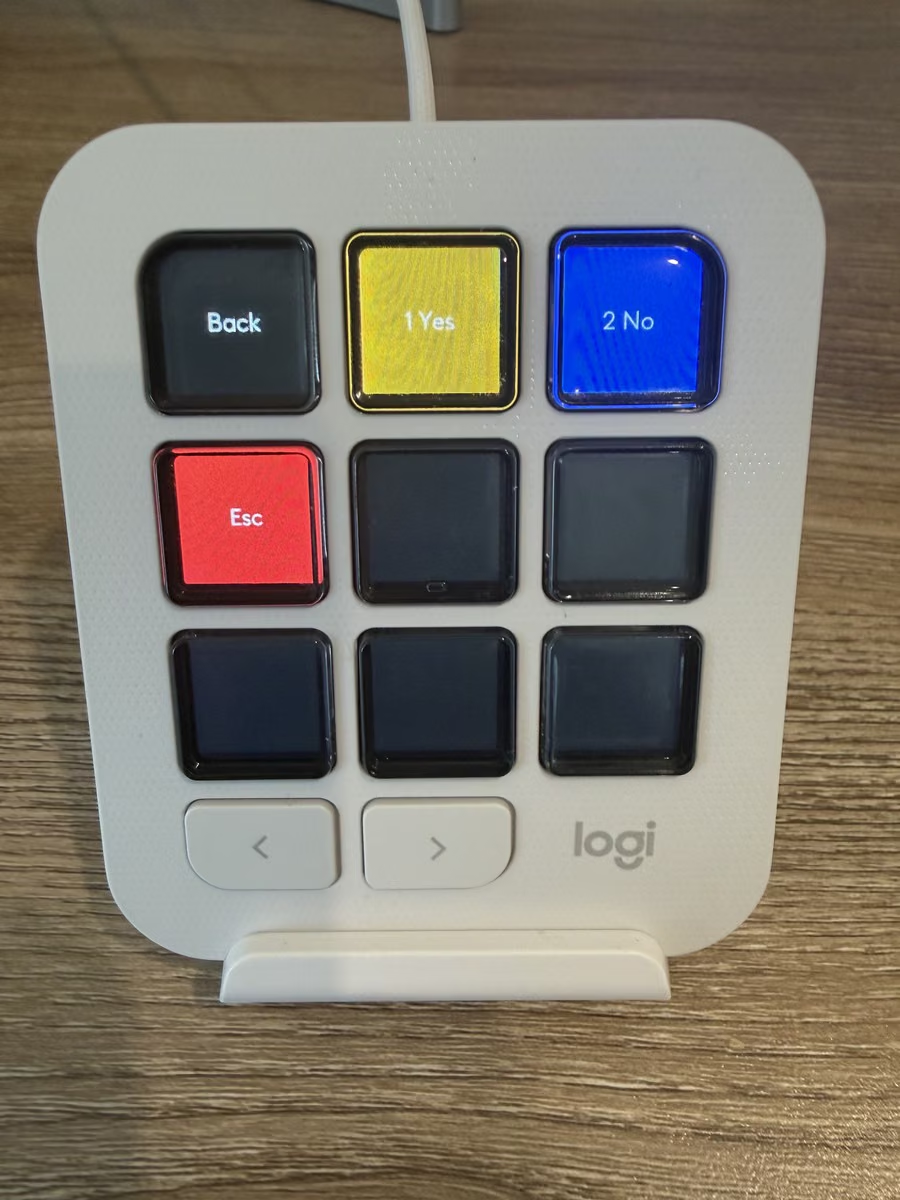
A simple yes or no:
A question with six answers, straight from Claude:
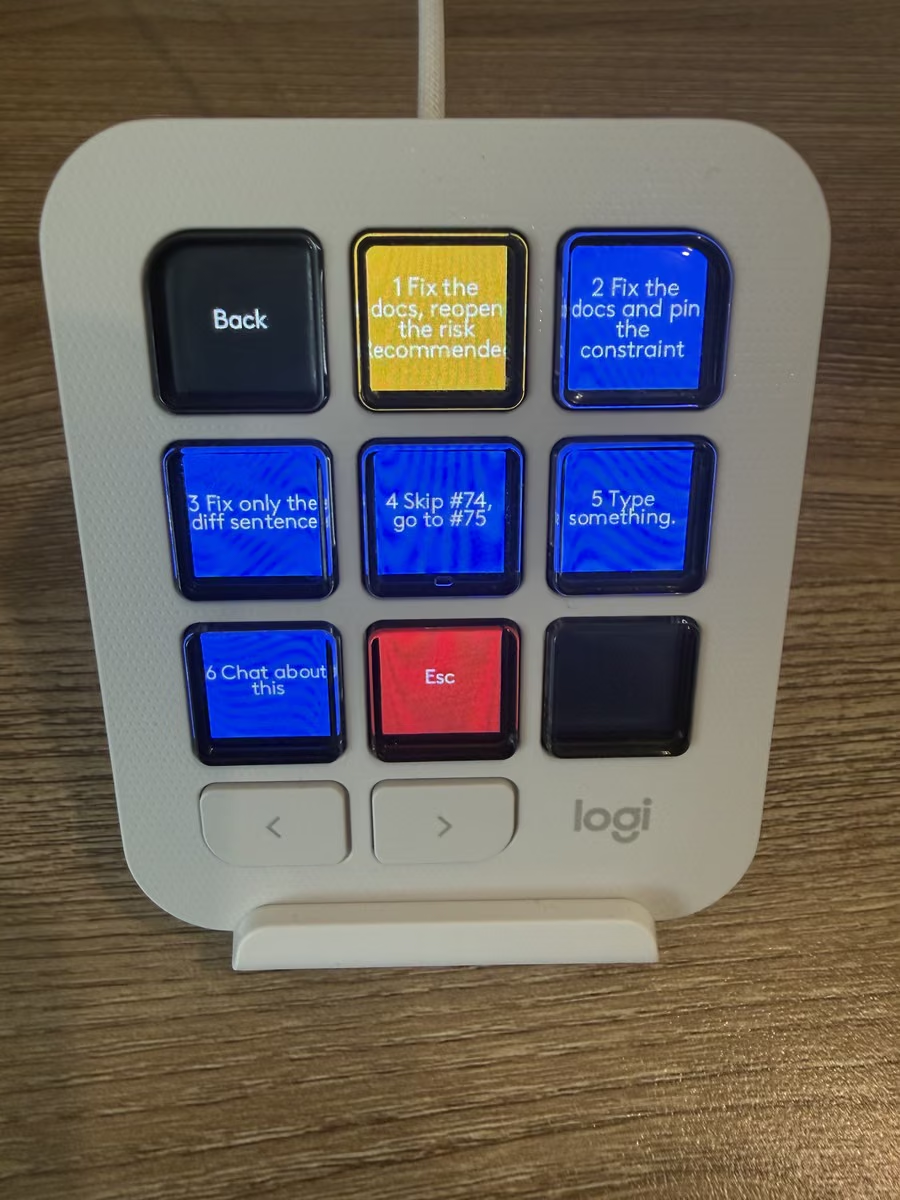
The yellow key shows where Claude’s cursor is. Press any option, and the keypad moves the cursor there and presses Enter.
That works for numbered menus and for the unnumbered ones, like the “do you trust this folder” check. When Claude asks several questions at once, in tabs, the page adds Tab keys to move between them.
When the agent is not waiting
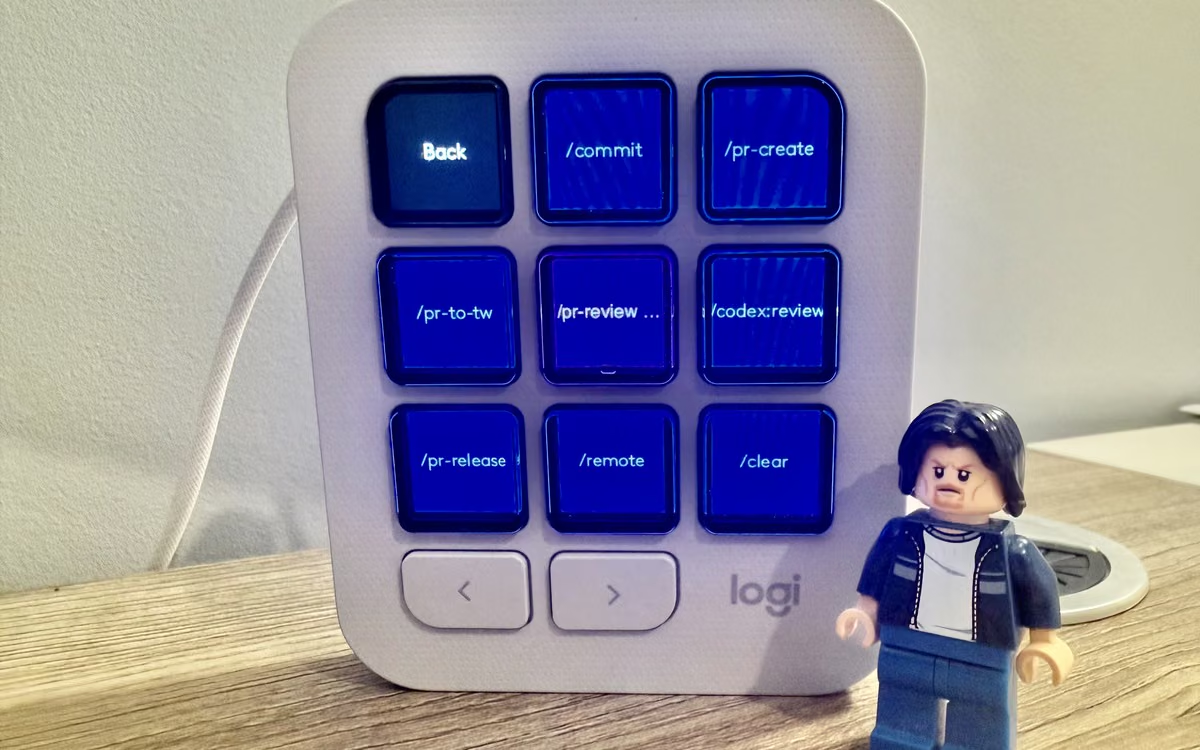
On the agent detail screen, I knew I wanted my frequently used skills listed.
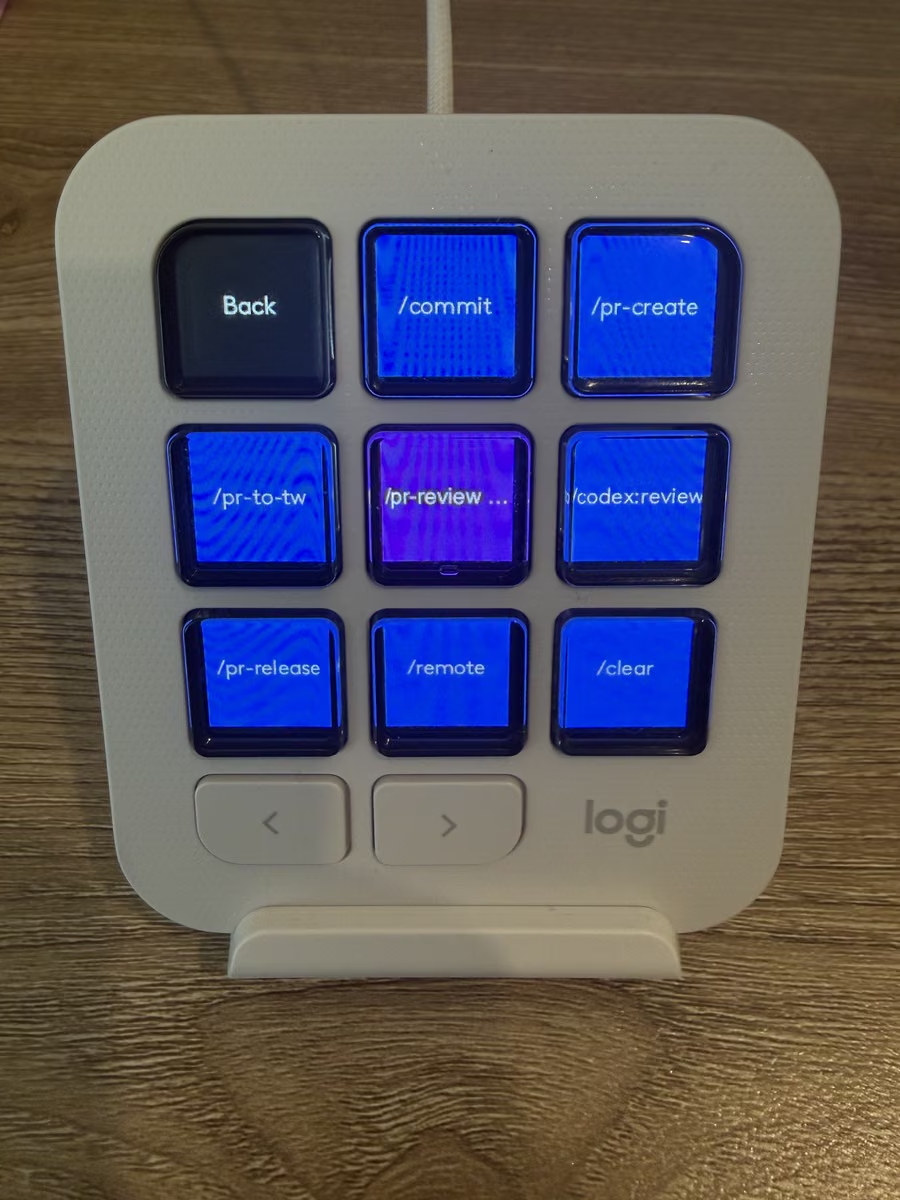
I had Claude Code count the slash commands in my own prompt history to decide which ones got a key.
/clear led with 310 uses. Commit messages and PR creation each came in at around 143.
PR review was next at 139.
Now I can quickly switch to an agent, make a commit, start a PR, or review my own or a coworker’s code even more quickly.
/pr-review has a little ”…” because it waits for me to type a PR number.
The commands come from a JSON file, so changing a key requires editing a single line.
Usage
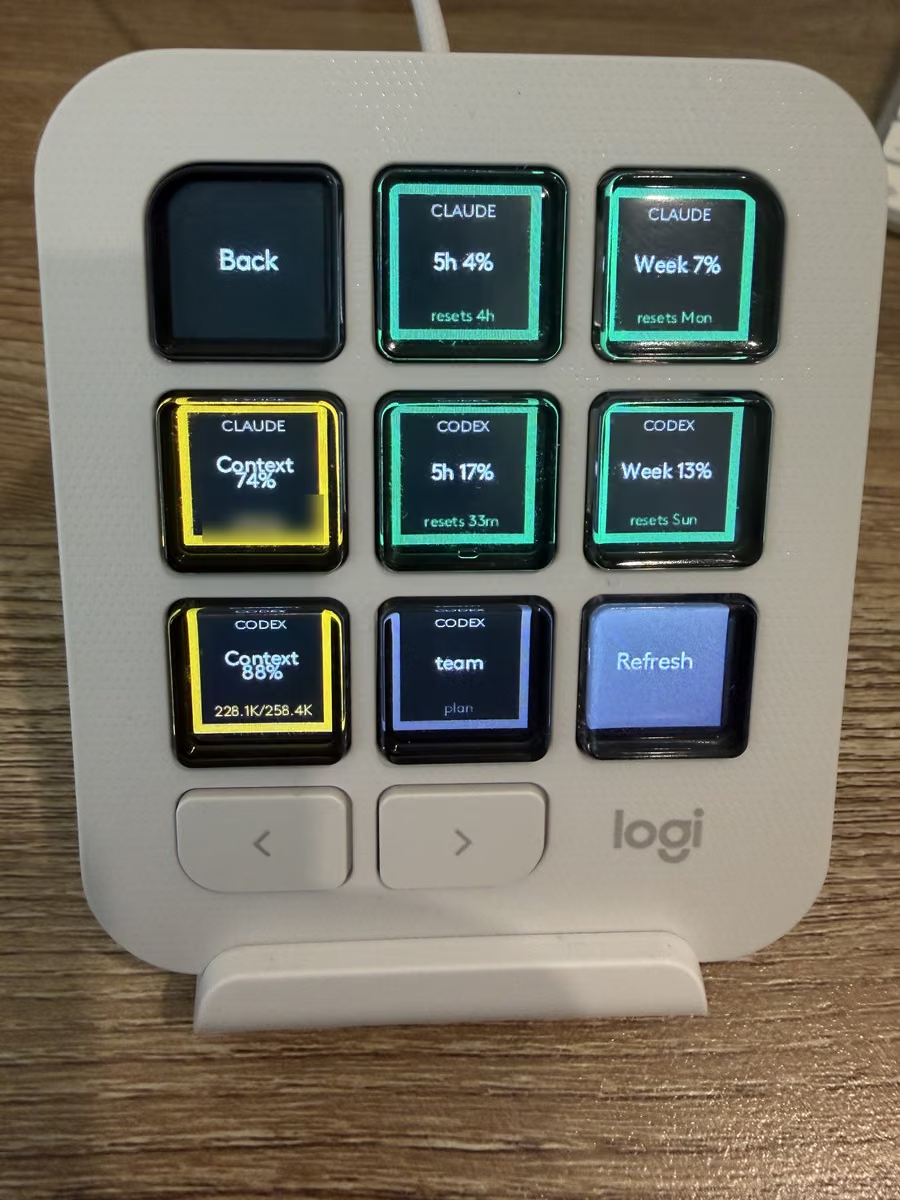
I created another top-level screen to keep track of usage.
Claude and Codex limits sit side by side here, with context used for each.
For the nerds
Claude Code and Codex send hook events to a small listener on my Mac. herdr has a socket API that reports every pane, its agent, and its status.
Both report the same session ID for the same agent, so the plugin merges them into one key.

Here is what happens when I answer a question from the keypad:
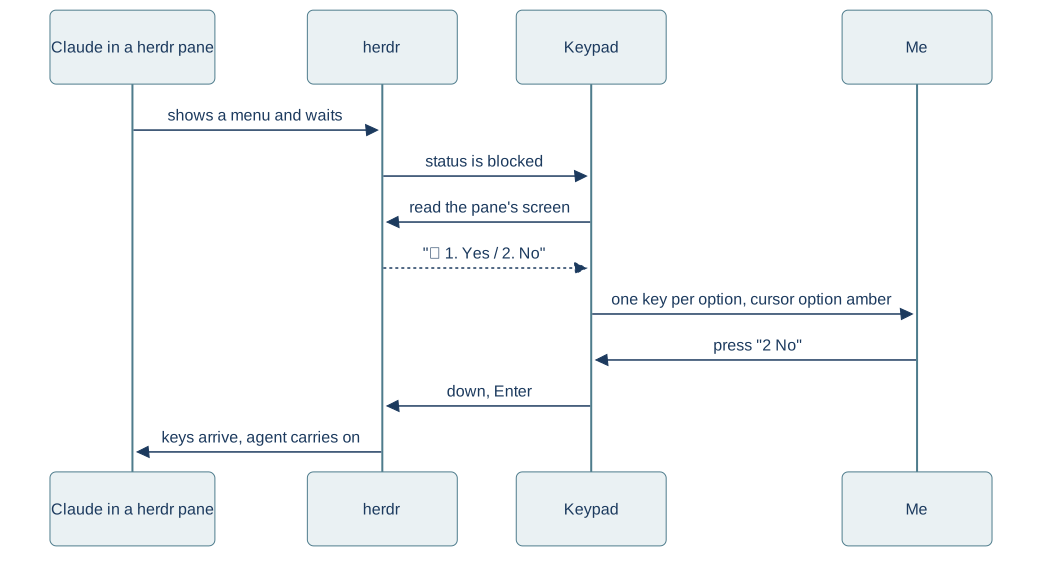
The plugins are C# on the Logi Actions SDK. There are five: one each for Claude, ChatGPT, iTerm, and herdr, plus a universal Agent Hub that owns the agent list.
What a week of using it taught me
The first version was organized around the tools, and the second around what I was trying to get done. The second is simpler, with one profile three levels deep and keys for the commands I use most.
It is the same process I use on website projects. Document the user journey, follow it to the user’s goal, and let the real data decide what goes on each screen.
I’ve used it for a week so far, and am getting into a groove with the workflows. Once I get it dialed in a little more, I will be looking to open-sourcing the plugin to see what other folks can do with it.